How to Add a Website in cPanel
If you’ve purchased a JetHost hosting plan and want to host more than one website, you can add a new one directly from cPanel. This is useful for running multiple sites under the same hosting account – like a blog, landing page, or separate business domain.
You can add a website in cPanel on JetHost using the Domains tool. This lets you connect another domain name to your account and create a separate folder for its content.
Step-by-step: Add a website in cPanel on JetHost
1. Log in to cPanel hosting account using your preferred method – through the JetHost client area or via direct URL.
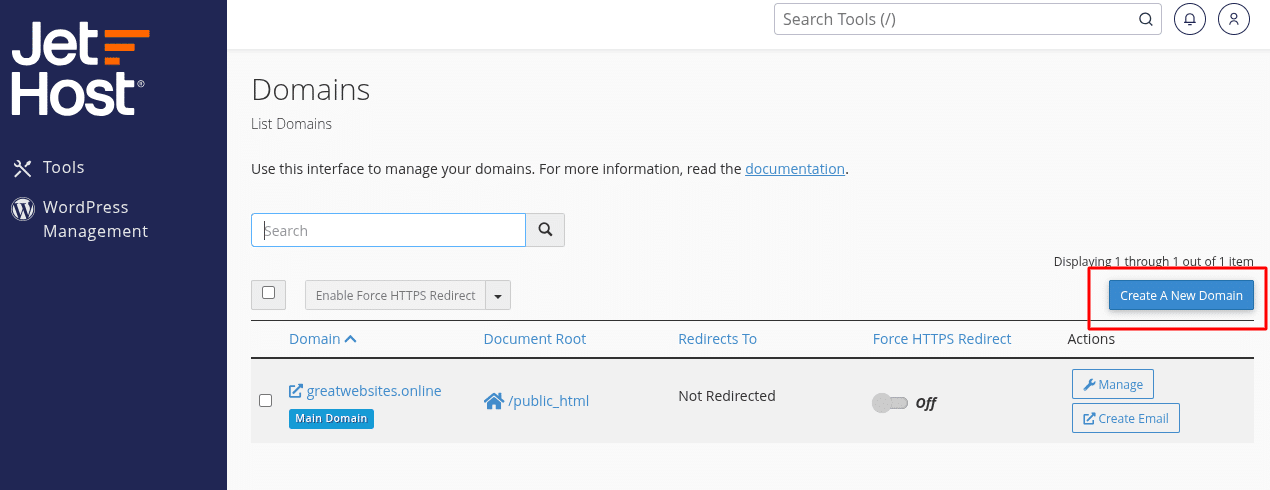
2. Scroll to the Domains section and click Domains.

3. Click Create A New Domain.

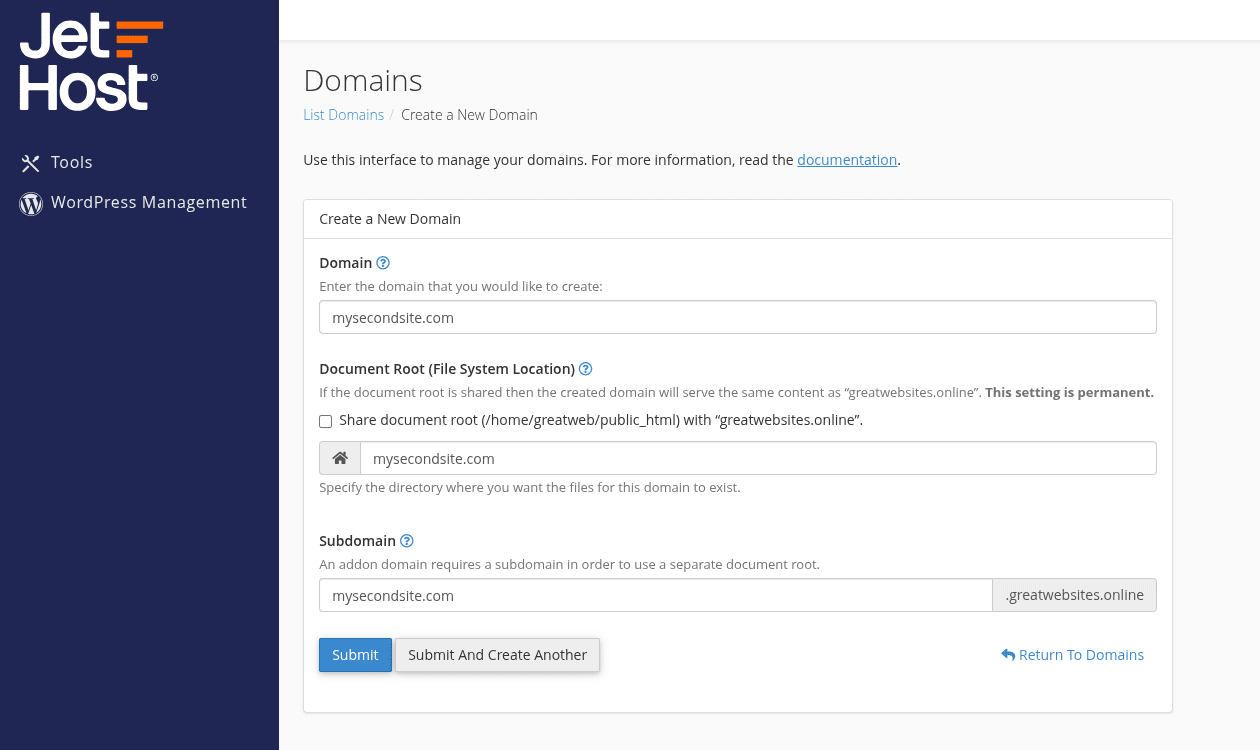
4. Enter the domain name you want to add – for example: mysecondsite.com.
5. Make sure Share document root with main domain is NOT checked. cPanel will automatically create a new folder under your hosting account for the site’s files.

6. Click Submit to finish.

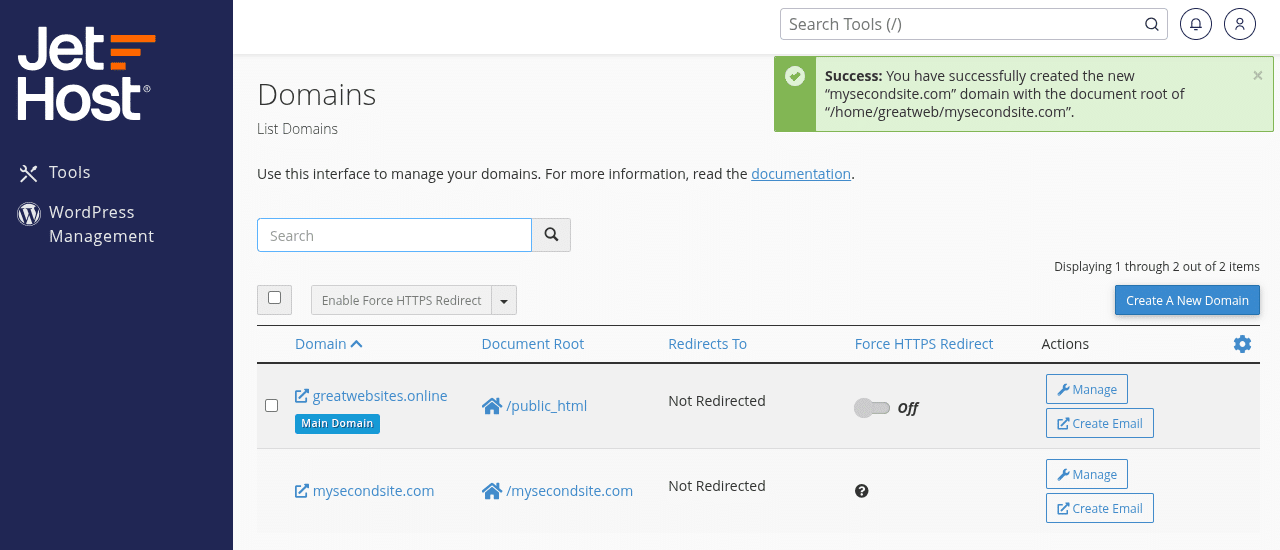
Once added, you’ll see the domain listed in the Domains interface, and the corresponding folder will appear in your File Manager. You can now upload your website files or install a CMS like WordPress in that folder.
JetHost Experts Tip
Make sure your new domain is pointed to JetHost’s nameservers before testing it. If it’s not registered through JetHost, update the DNS records at your registrar to match your hosting settings.
Need More Help?
Having trouble adding the domain or not sure what to do next? Contact us and we’ll help you get the new website connected and ready to use under your JetHost hosting plan.
You can also browse our other step-by-step guides on hosting account management, working with cPanel, uploading files, setting up email, or installing WordPress on your new domain.


