How to create an email account in cPanel
This guide shows you how to create email account for your domain from inside cPanel. You will create the address, set its password, and see where to find the connection details for mail apps and phones.
Step 1: Log in to cPanel
1. Sign in to cPanel with the credentials from your welcome email.
2. On the dashboard, locate the Email section.
Step 2: Open Email Accounts
Click Email Accounts. The page lists any mailboxes that already exist for your domain.

Step 3: Start the mailbox wizard
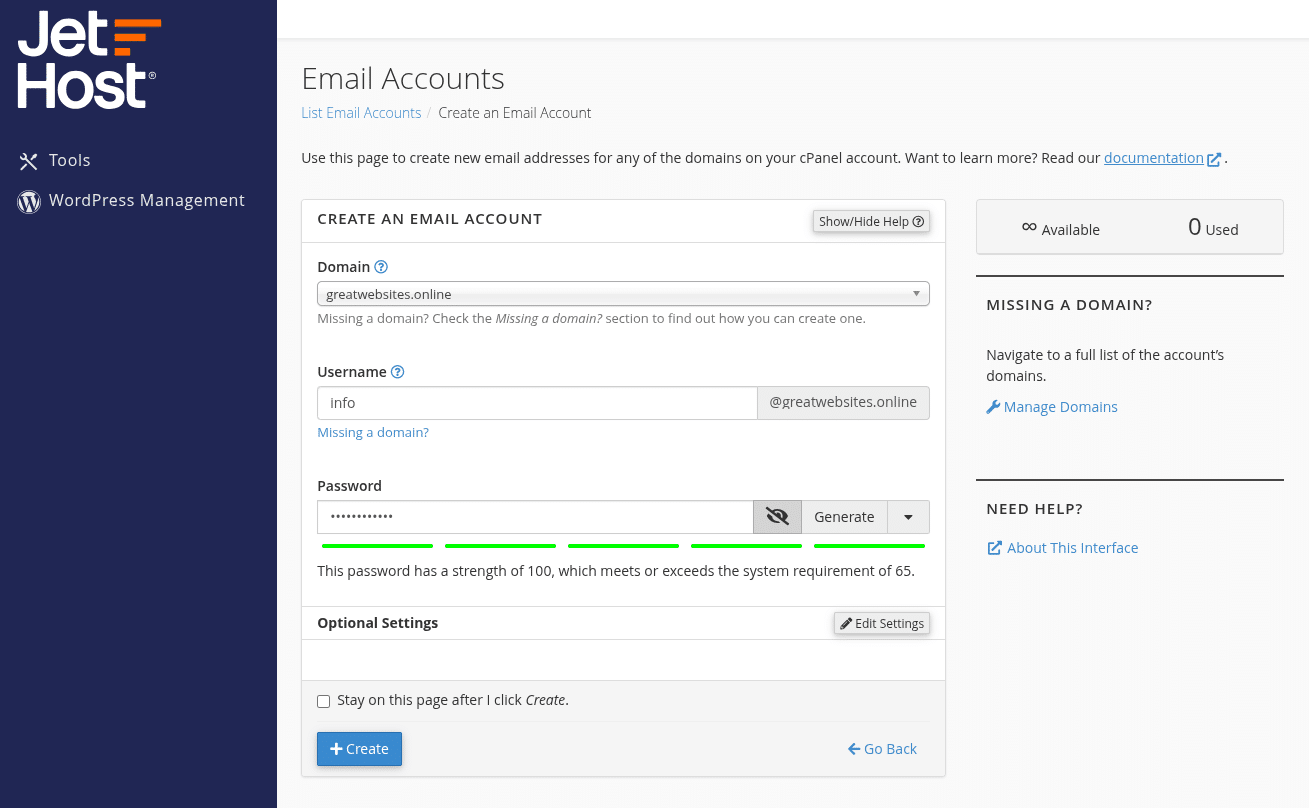
Click the blue Create button on the right. If your cPanel hosts more than one domain, pick the correct domain from the dropdown list.

Step 4: Enter mailbox details
Username – type the part that comes before @your‑domain.com (for example, info).
Password – create a strong password or click Generate and copy it to your password manager.
Click Optional Settings to manage the storage space. You can leave the default value or set a custom quota in megabytes.

Step 5: Create the account
Review the settings. Click Create. A success banner confirms the mailbox has been added. The new address now appears in the list of email accounts.
Step 6: Find your mail‑client settings
Next to the mailbox row, click Check Email or Connect Devices.
A panel opens with the secure IMAP, POP, and SMTP server names, ports, and SSL requirements. Copy these details into Outlook, Apple Mail, Thunderbird, or a mobile mail app.

Best practices
– Use unique, complex passwords for every mailbox.
– Enforce reasonable storage limits so large attachments don’t fill the disk.
– Publish SPF, DKIM, and DMARC records to improve deliverability.
– Remove or disable unused mailboxes to reduce spam targets.


