



How to Edit Your Website Content with AI Site Builder
In the previous article, we showed you how to launch a website with AI Site Builder using only a short description of your business. After the website is generated, you can review it and start customizing it through the built-in AI Agent.
You no longer need to go through complex settings to make your first content edits. The AI Site Builder automatically creates the foundation, and then gives you the option to change headings, text, section descriptions, and the tone of communication directly through the AI chat. In this article, we’ll show you how to edit your website after it has been created.
Open your completed website
After AI Site Builder finishes creating your website, you will see the generated homepage. It will include the main structure, sample text, images, color palette, fonts, and sections based on the description you entered at the beginning.
Your first task is simply to explore the website as a visitor. Review the headings, sections, text, images, and overall look. This will make it easier to decide what you want to keep and what needs editing.
Use the AI agent chat panel
After the website is created, an AI chat panel will open on the left. This is the main place where you can manage the next changes to your website. Instead of manually searching for different settings in the editor, you can use the chat to say what you want to change. For example, some of the few things you can ask for are:
The chat will suggest options or apply the change based on the selected option.
Choose what you want to change
In the AI chat panel, you can start with a specific request for the text you want to edit. This could be a heading, short description, services section, business introduction, or any other text on the page.
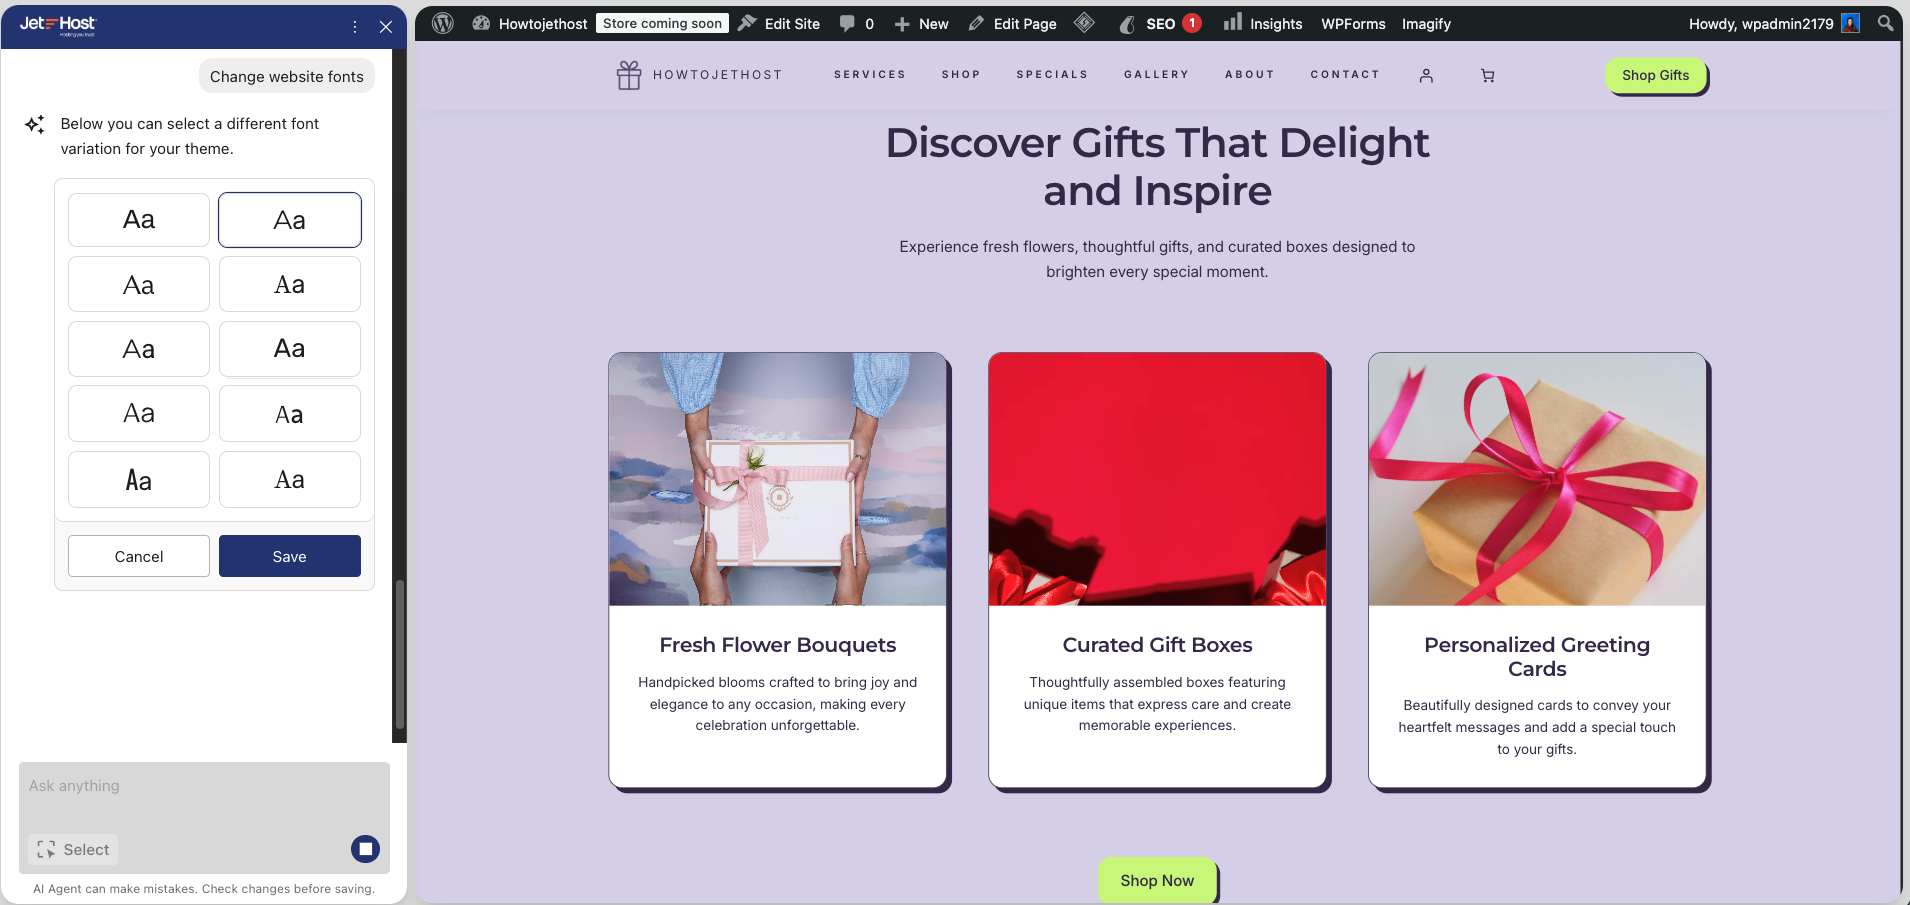
For example, if you choose to change the fonts, you will receive different typography options. If you choose to change the colors, you will see new color combinations. If you want to change the style, AI will suggest a new visual direction.
Write a specific instruction
In addition to choosing from the ready-made suggestions, you can also write your own instructions directly in the AI chat, such as: “Change the images on the website” or “Change the tone of the homepage so it sounds more professional.”
It is important to know that not every request is completed directly by the chat itself. For some changes, the AI agent will give you specific instructions on how to make the edit and will show you a quick-access button to the correct place in the WordPress admin area.
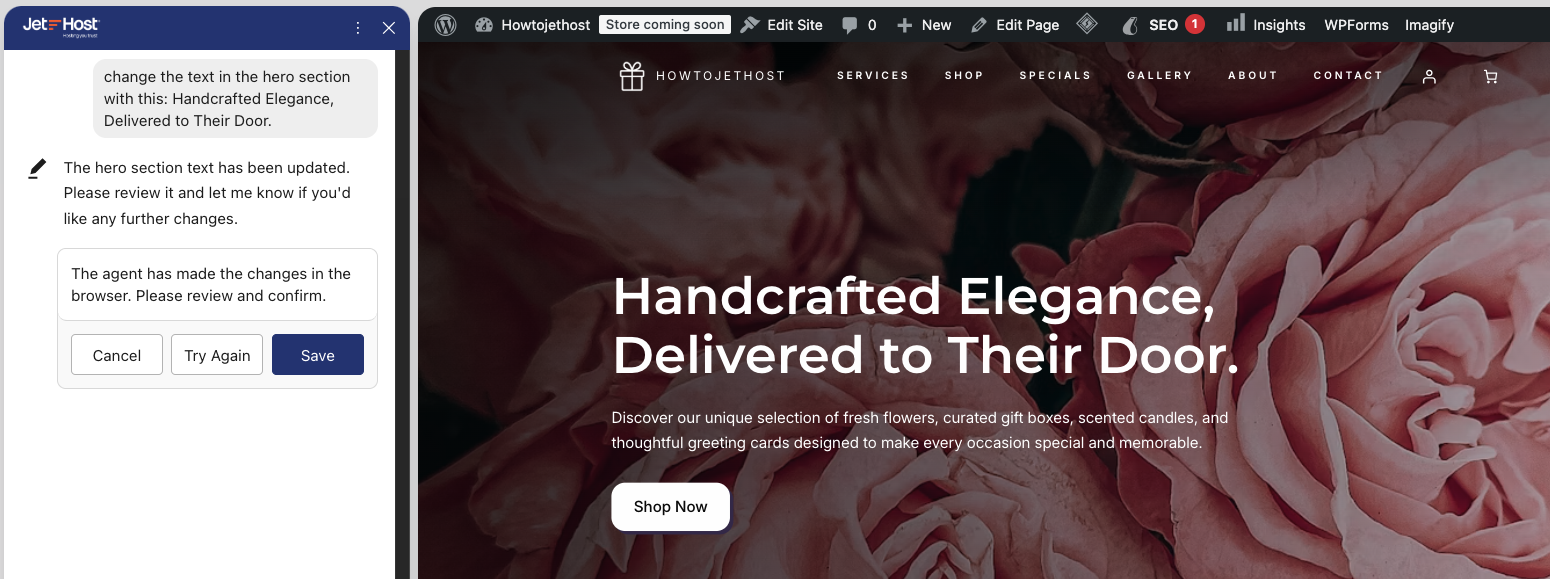
For example, if you write “Change the text in the hero section,” the AI agent may ask you what new text you want to use, including the heading, subheading, and button text, if those should also be changed.
After you enter the new text, the AI agent will apply it to the website and show you a message that the change has been made. You can then review the result directly in the browser and decide whether to save it, cancel it, or try again with another instruction.
Review and apply the changes
After you request a change, AI Site Builder will show you a different type of response depending on the request itself.
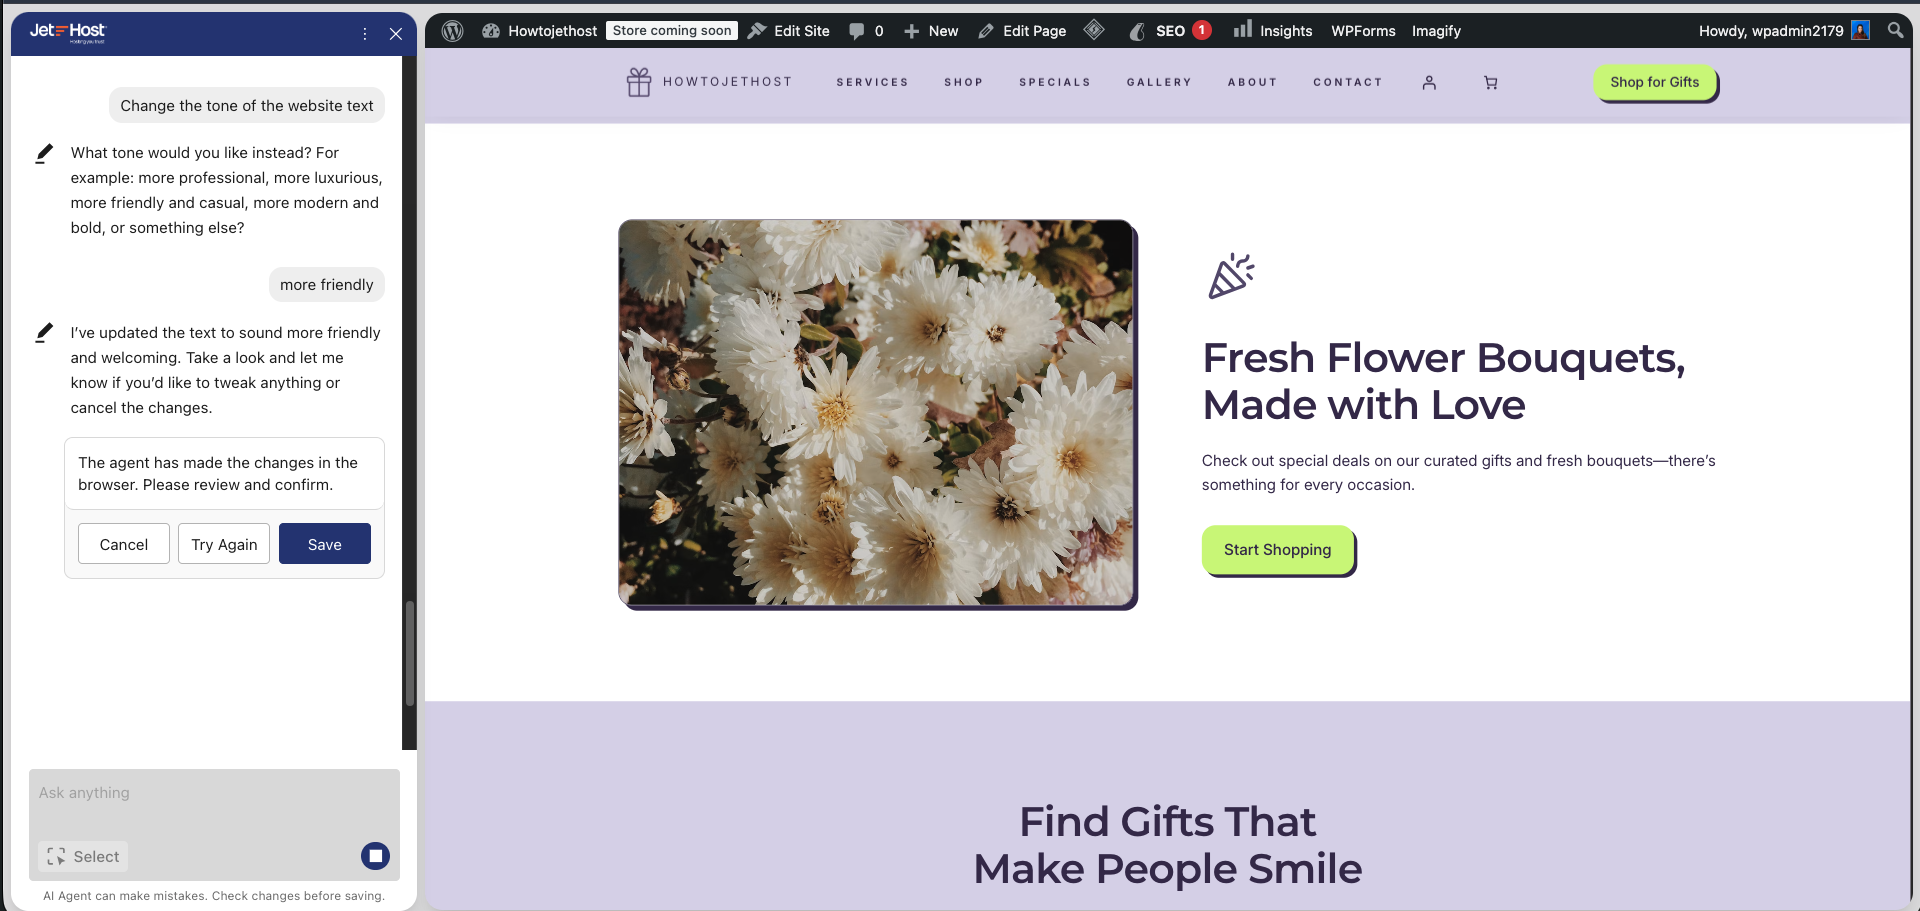
For example, you can write: Change the tone of the website text. The AI agent will ask you what tone you want to use – more formal, more friendly, more sales-focused, more creative, or something else. You can also specify whether the change should be applied to all text on the homepage or only to specific sections.
After you choose the desired tone, for example “more friendly,” the AI agent will make the change and show you the updated text in the browser. From there, you can review the result and decide whether to save it, cancel it, or try again with another instruction.
If the text still does not sound the way you want it to, you can continue the conversation with a more specific request. You can repeat this process until the content starts to sound closer to your business and to the way you want to communicate with your customers. Once you are happy with the edits, click Save to apply the changes.
JetHost Experts Tip
When you use the AI agent to edit text, always review the suggested changes carefully before confirming them. If you ask to change the tone of all text on the page, the AI agent may update several sections at once, so it is a good idea to check whether each change sounds right for your business. If you do not like a certain part, you can cancel the change or try again with a more specific instruction. For example, you can point to a specific section, a specific piece of text, or the desired tone to get a more accurate result.
Need more help?
If you run into any questions or errors during setup, our team is here 24/7. Click the AI Help Assistant icon in the bottom right corner of your dashboard for on-screen guidance. You can also contact JetHost support team.