How to upload files with FileZilla and configure FileZilla settings
FileZilla is a free FTP client for uploading and managing your website files on JetHost. This guide shows you how to connect, upload files, and adjust the settings that help avoid connection errors and slow transfers. The steps work on Windows, Mac, and Linux – FileZilla’s interface is the same on all platforms.
Step 1: Connect to your JetHost account
Option A – Quick Connect
- Open FileZilla.
- In the Quick Connect bar at the top, enter: Host: your domain (e.g.
yourdomain.com), Username: your cPanel username, Password: your cPanel password, Port:21for FTP or1022for SFTP. - Click Quickconnect.

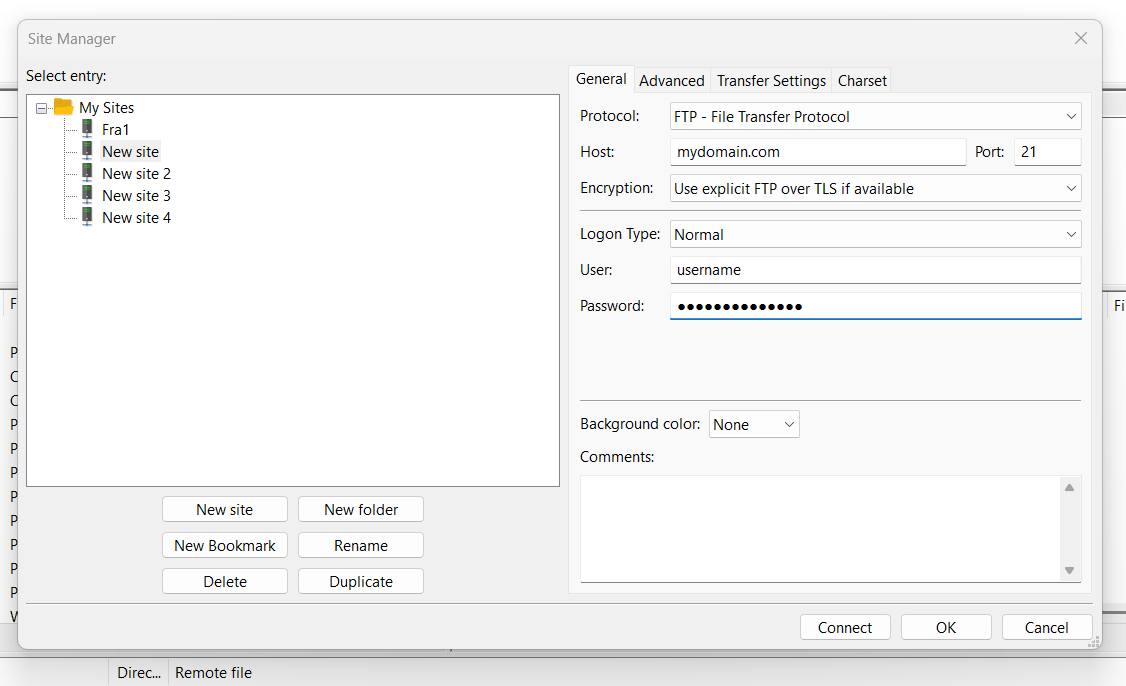
Option B – Site Manager (save your connection)
- Go to File → Site Manager.
- Click New Site and give it a name (e.g. “JetHost”).
- Enter Host: your domain, Port: 21 (FTP) or 1022 (SFTP), Protocol: FTP or SFTP.
- Set Encryption: “Use explicit FTP over TLS if available” (for FTP).
- Set Logon Type: Normal. Enter User and Password.
- Click Connect. Accept the server certificate if prompted.
For full connection details, see How to connect your JetHost account via FTP.
Step 2: Open the correct folders
Website files go in the public_html folder. That is your domain’s document root.
- On the left (Local site): open the folder on your computer that contains the files you want to upload.
- On the right (Remote site): navigate to
public_html(or the subfolder where you want the files). - If you don’t see the folder trees, go to View → enable Local tree and Remote tree.
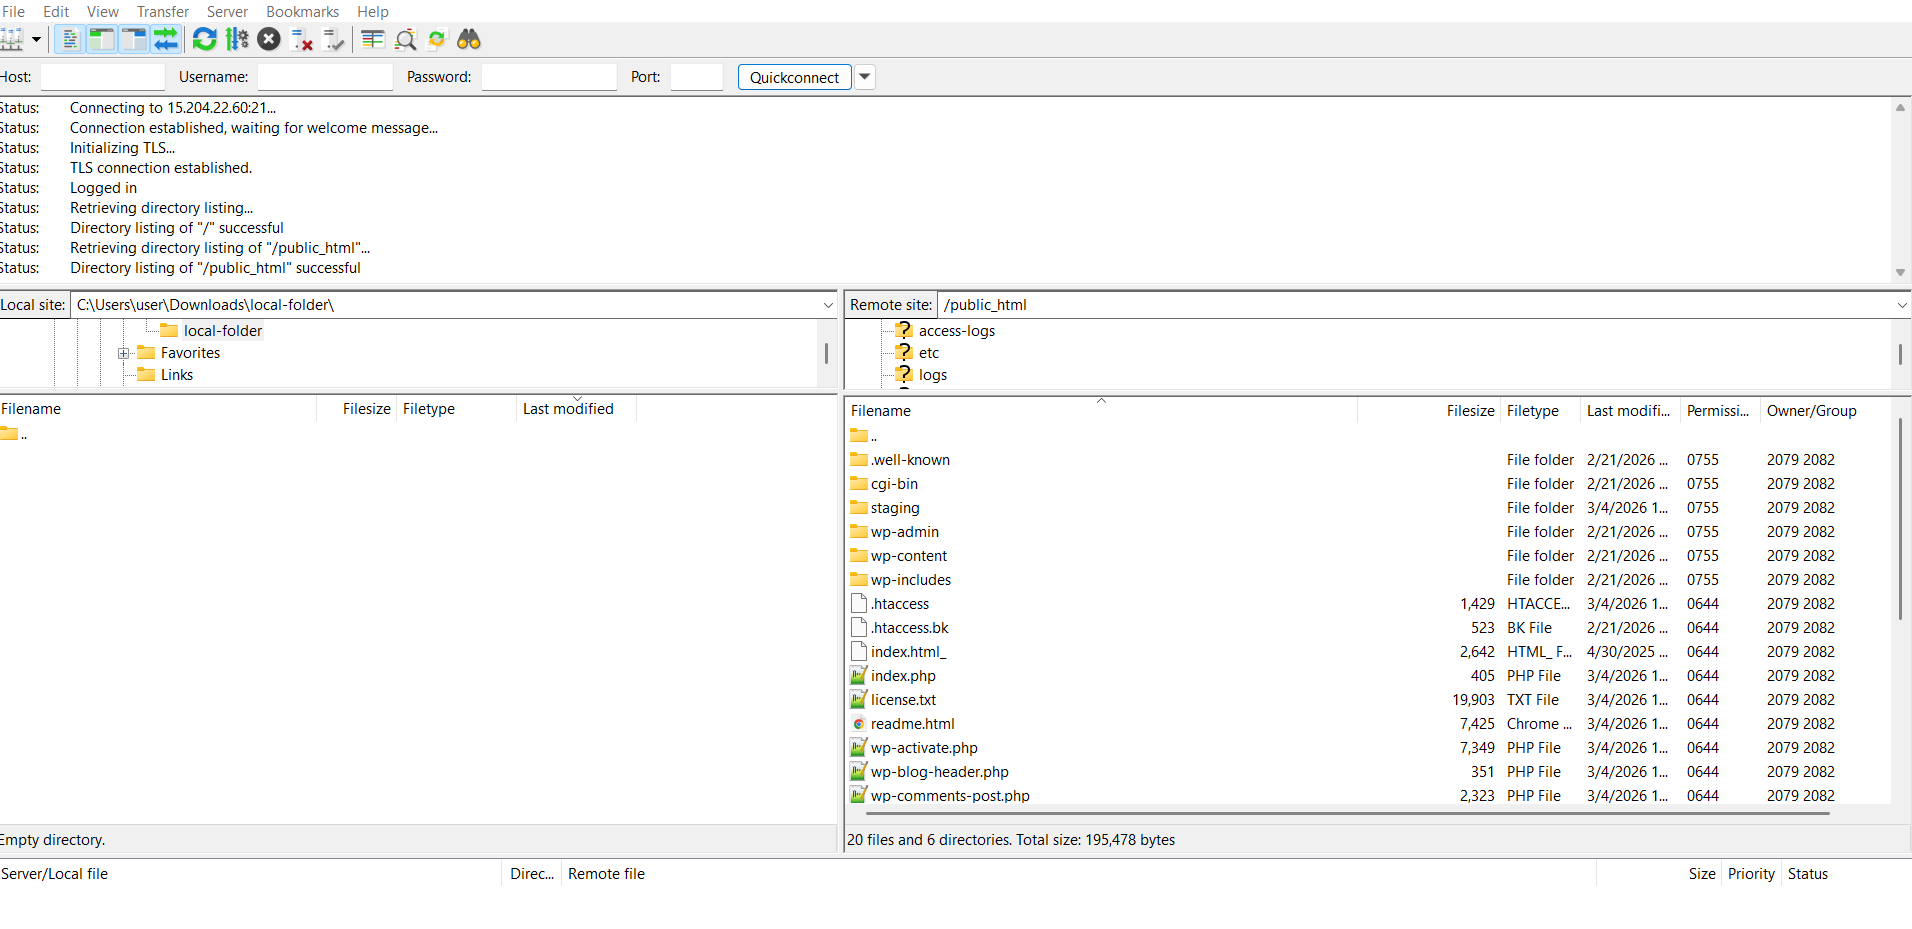
Step 3: Upload files
- On the left, select the file(s) or folder(s) you want to upload.
- Right-click → Upload, or drag and drop them to the right panel.
- Watch the transfer progress at the bottom of the window.
- To download: select files on the right, right-click → Download, or drag to the left.
FileZilla settings
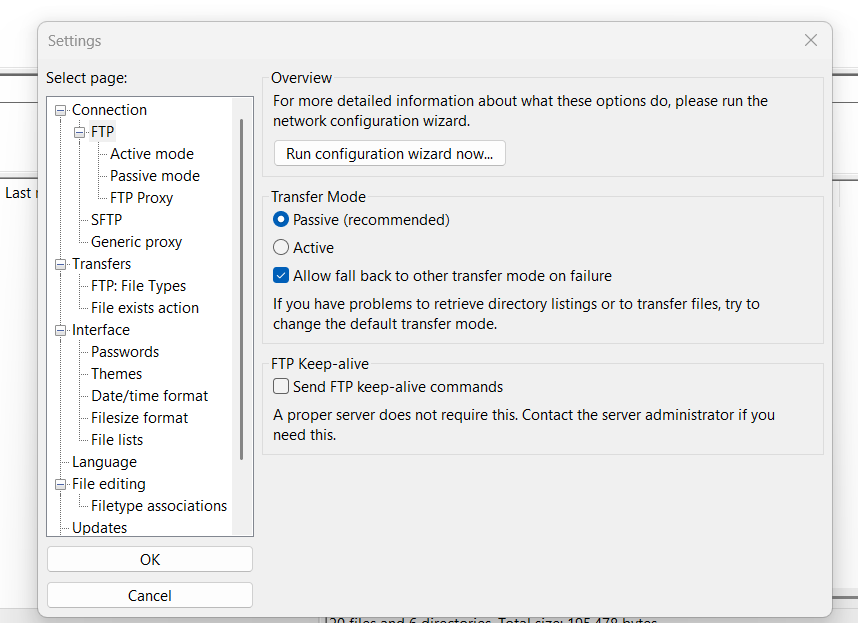
Passive mode (recommended)
If you have connection issues, enable passive mode:
- Edit → Settings → FTP.
- Select Passive.
- Click OK.

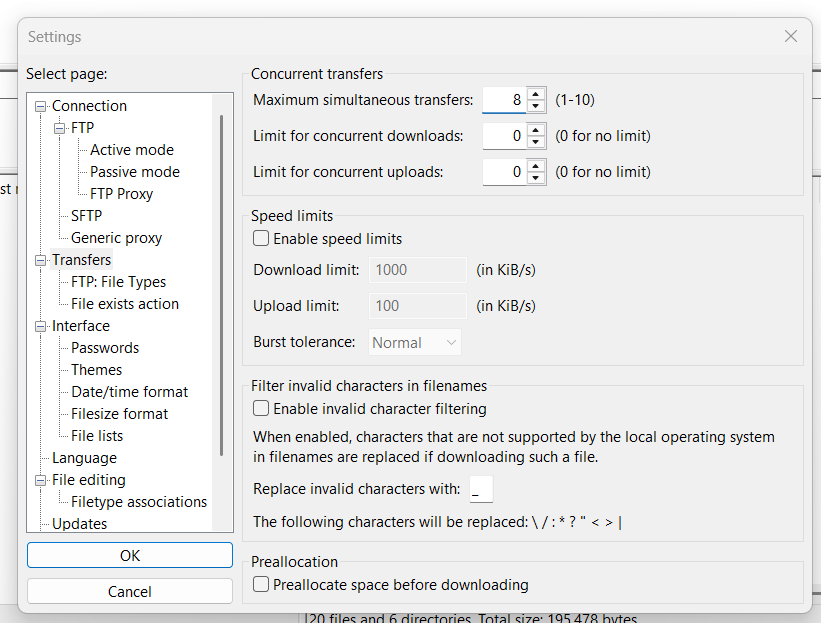
Simultaneous transfers
Limit how many files transfer at once so your site stays responsive. We recommend 5 or fewer:
- Edit → Settings → Transfers.
- Set Maximum simultaneous transfers to
8(or less). - Click OK.
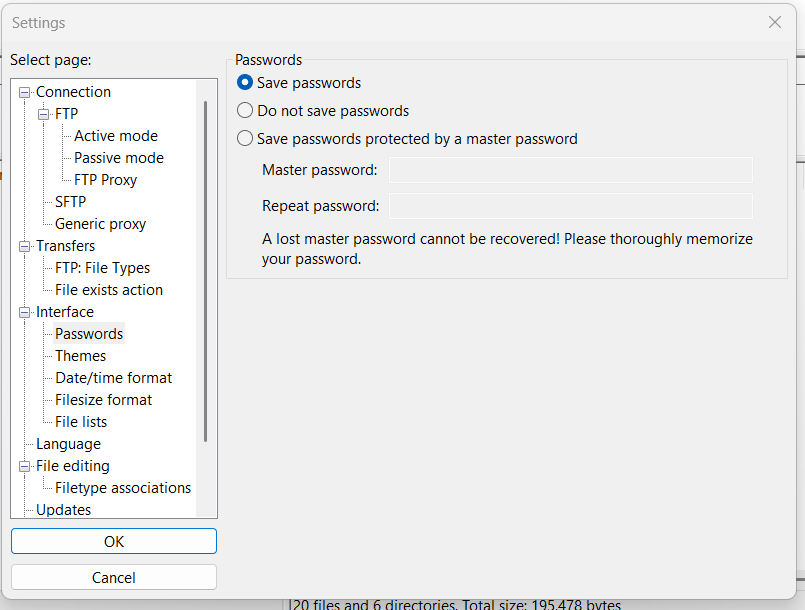
Save passwords (Site Manager)
If FileZilla won’t save your password in Site Manager:
- Edit → Settings → Interface.
- Enable Save passwords.
- Click OK.
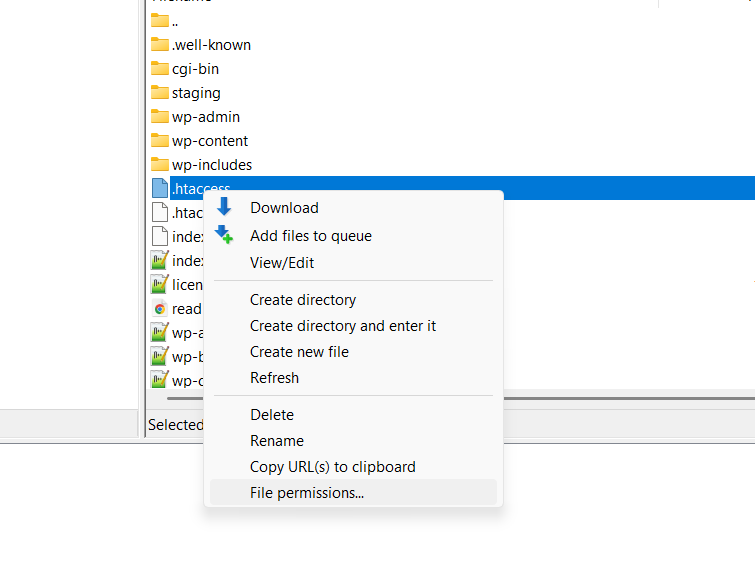
Change file permissions
- Right-click a file or folder on the right (remote) side.
- Choose File permissions.
- Set numeric value or checkboxes. Common:
644for files,755for folders. - For folders, you can apply changes recursively to all contents.
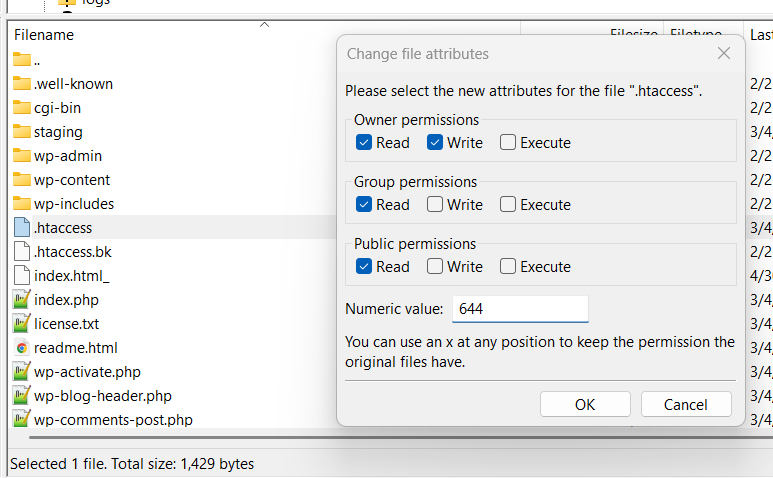
And then you can select and change permissions:
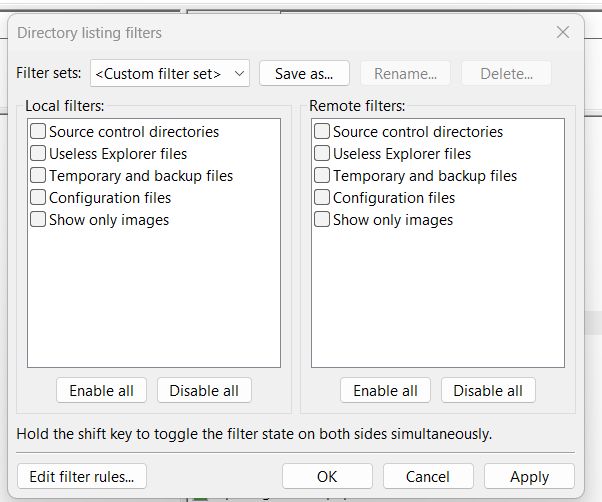
Show or hide hidden files
- View → Directory listing filters.
- Under Remote filters, the Configuration files option controls hidden (.dot) files.
- Enable it to hide them; disable to show them.
Troubleshooting
File transfer failed: Enable passive mode. Reduce simultaneous transfers to 1–2. Increase timeout: Edit → Settings → Connection → set timeout to 60–120 seconds. Try SFTP (port 1022) instead of FTP. Check that your firewall or antivirus is not blocking FileZilla.
Slow upload or download: Lower simultaneous transfers to 3–5. Ensure your network is not busy with other downloads or streaming. Large batches of files can take time due to server limits.
Too many files: FTP can list up to 2000 files per directory. Organize into subfolders or use cPanel File Manager for very large directories.
Need more help?
See How to install FileZilla on Windows and How to connect via FTP. Contact our support team for assistance. JetHost web hosting includes FTP and SFTP access on all plans.