How to Use Directory Privacy in cPanel on JetHost
If you want to restrict access to certain folders in your hosting account, cPanel makes it easy. The Directory Privacy tool lets you password-protect any folder in your File Manager, so only people with the login can view its contents in a browser.
You can use Directory Privacy in cPanel on JetHost to secure areas like development folders, staging versions of your site, or private downloads.
How to Password-Protect a Folder
1. Log in to cPanel hosting account.
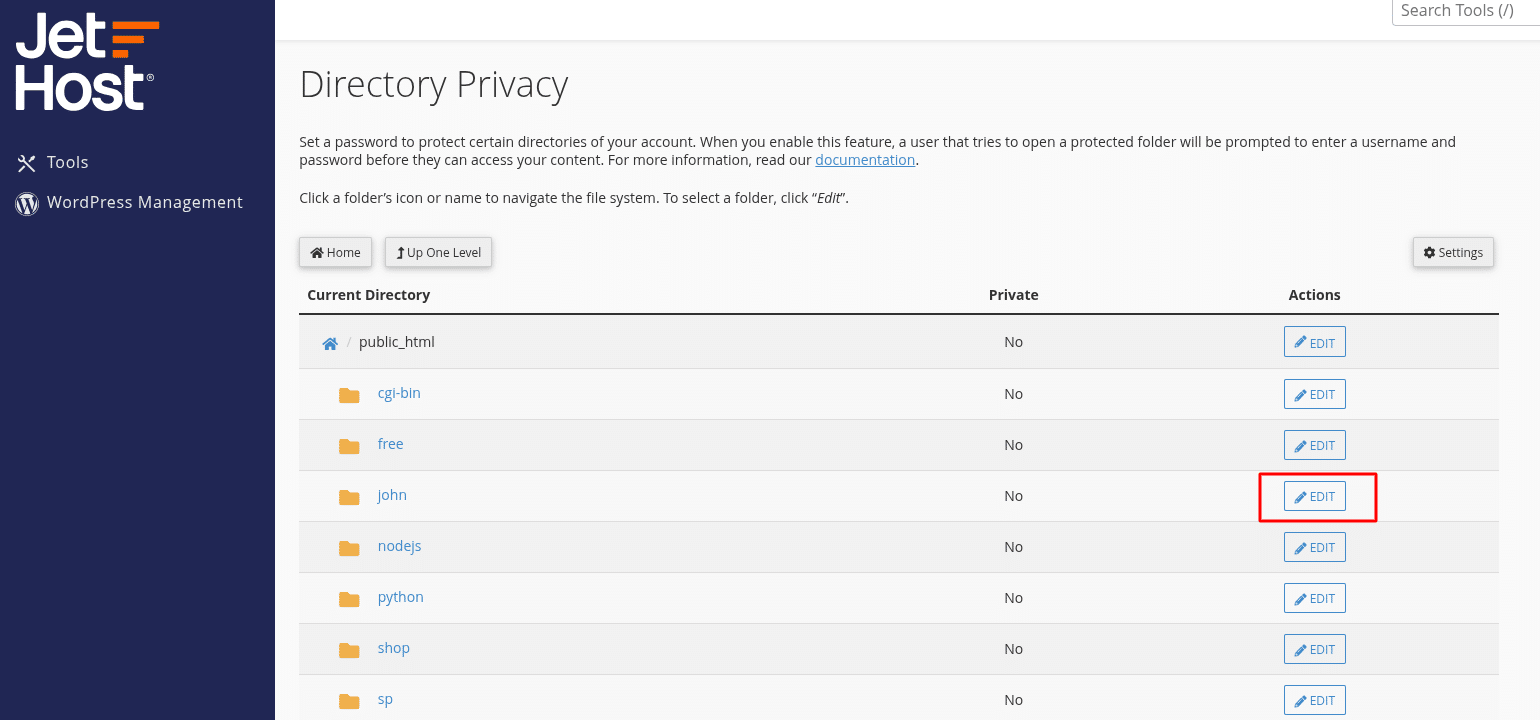
2. In the Files section, click Directory Privacy.

3. A folder tree will appear. Click to open the path to the directory you want to protect.
4. Click Edit to open privacy settings.

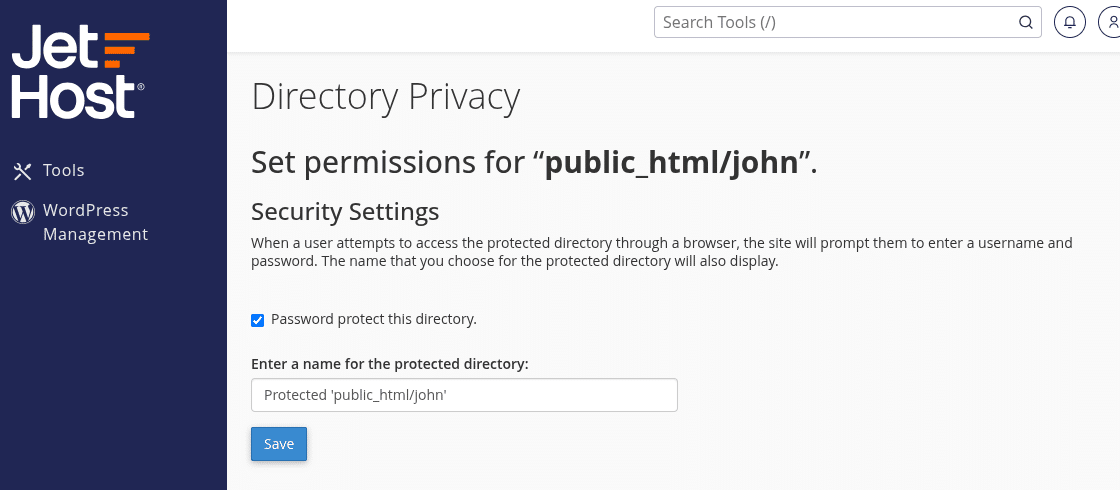
5. Check the box for Password protect this directory.
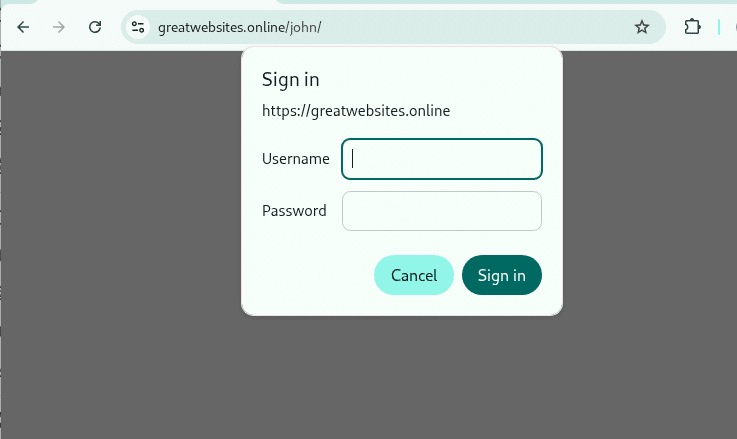
6. Enter a name for the protected area – this will show on the browser login prompt.
7. Click Save.

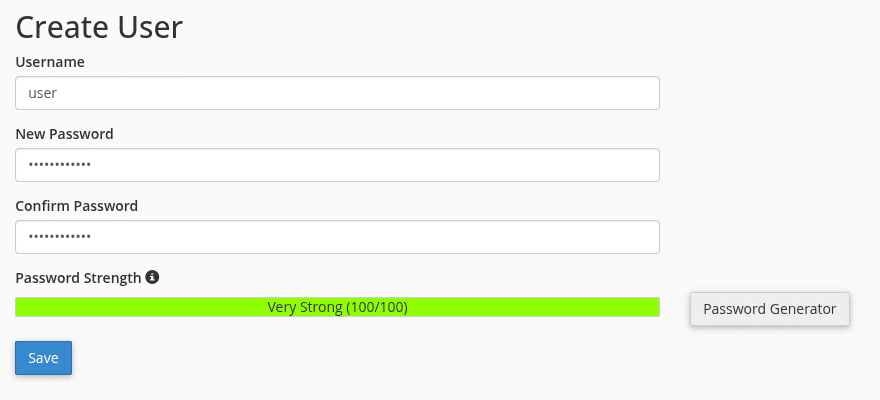
8. Under Create User, enter a username and a strong password. Click Save again.

Once complete, that folder is protected. Visitors will need to enter the credentials you created before they can see the contents in a browser.

How to Remove Protection
To disable the login requirement:
1. Go to Directory Privacy again.
2. Navigate to the protected folder.
3. Uncheck Password protect this directory and save the changes.
Optionally, delete the associated user account if it’s no longer needed.
JetHost Experts Tip
You can use Directory Privacy in cPanel on JetHost to keep internal tools or shared resources available only to team members or clients. It’s especially useful when working on a private area of your site that isn’t ready for public view.
Need More Help?
If you don’t see the folder listed or the login window doesn’t appear when you visit the URL, contact us. You can also browse our tutorials for more ways to manage access and secure your JetHost hosting account.


