How to Use User Manager in cPanel
The User Manager in cPanel lets you manage access for other people who need to use your hosting account. You can create logins for email, FTP, or both – without giving out your main cPanel credentials. It’s a simple way to give someone limited access to specific functions or folders.
This guide will show you how to use User Manager in cPanel on JetHost to create, edit, and remove users as needed.
How to Add a User with User Manager in cPanel
1. Log in to cPanel hosting account.
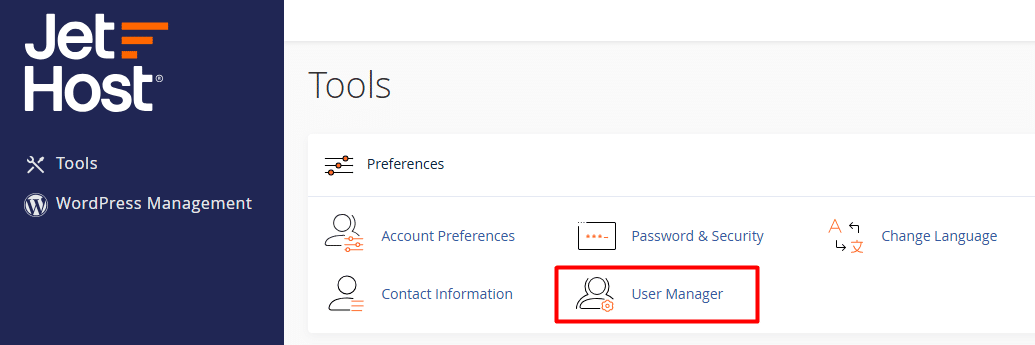
2. In the Preferences section, click User Manager.
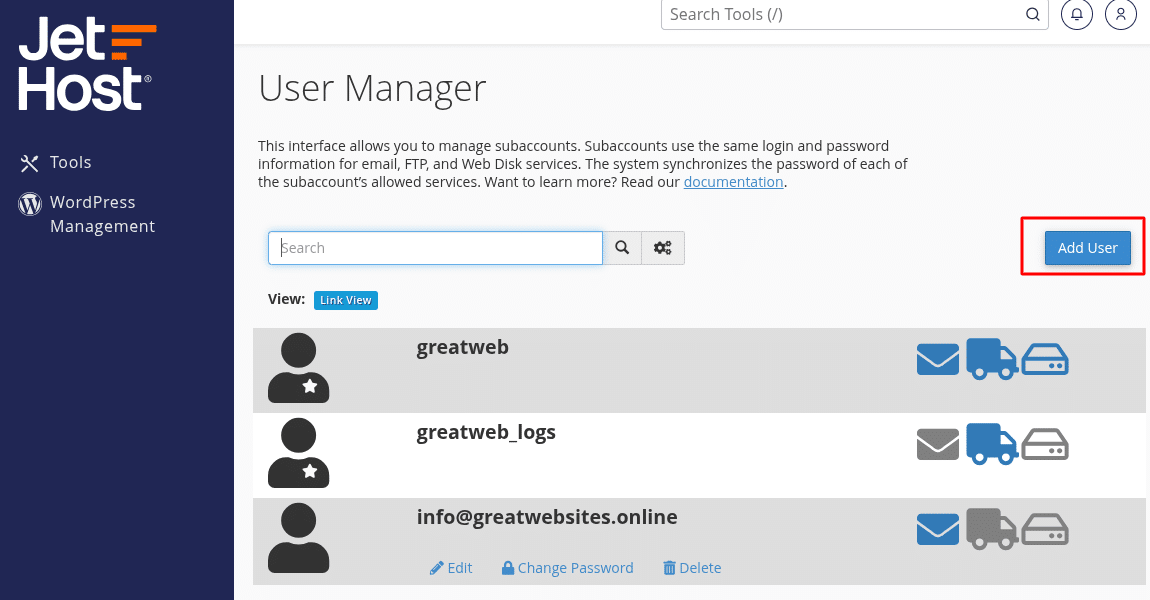
3. Click the Add User button in the top-right corner.
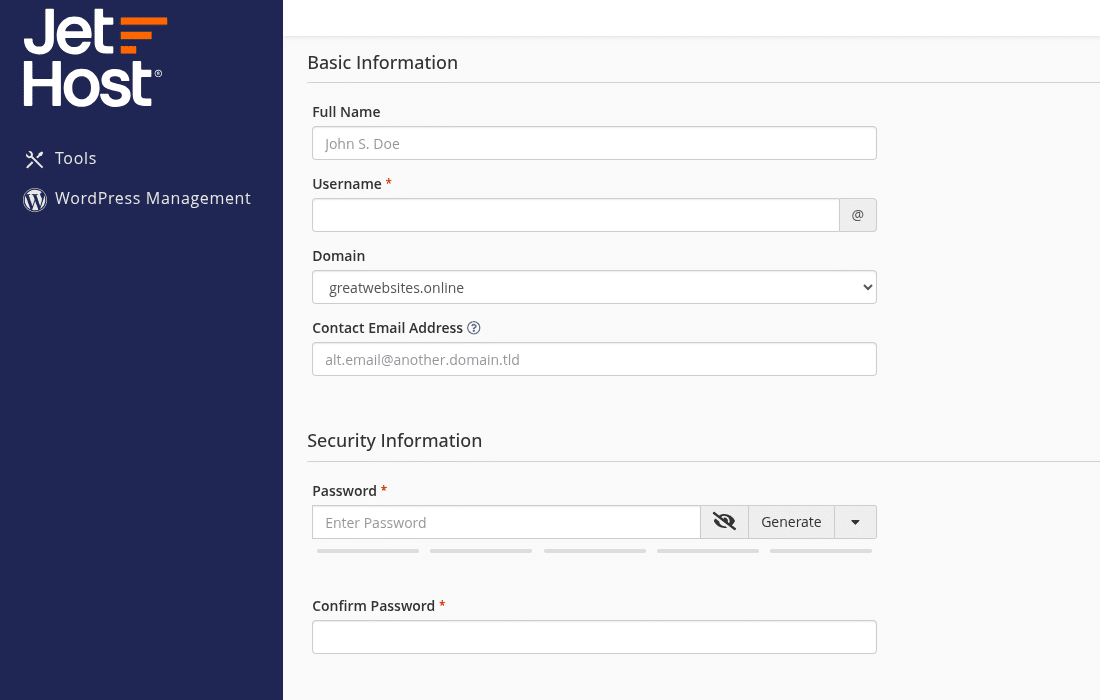
4. Enter the person’s name, username, and select domain.
5. Set a password or use the password generator.
6. Choose which services the user should have access to – Email or FTP.
7. Click Create.
How to Edit or Remove a User in cPanel
To manage an existing user:
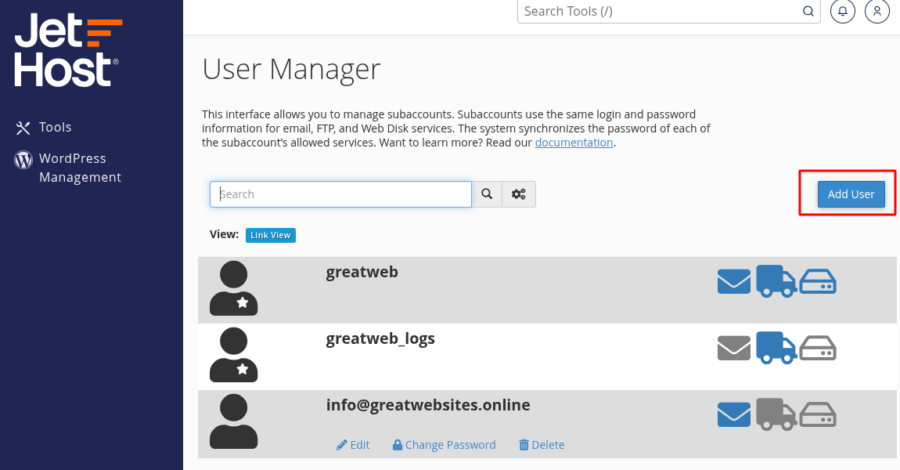
1. In User Manager, scroll through the list or use the search bar to find the user you want to edit.
2. Click the corresponding button next to their account – you’ll see options like Edit, Change Password, or Delete clearly listed.
Select the action you need and follow the prompts.
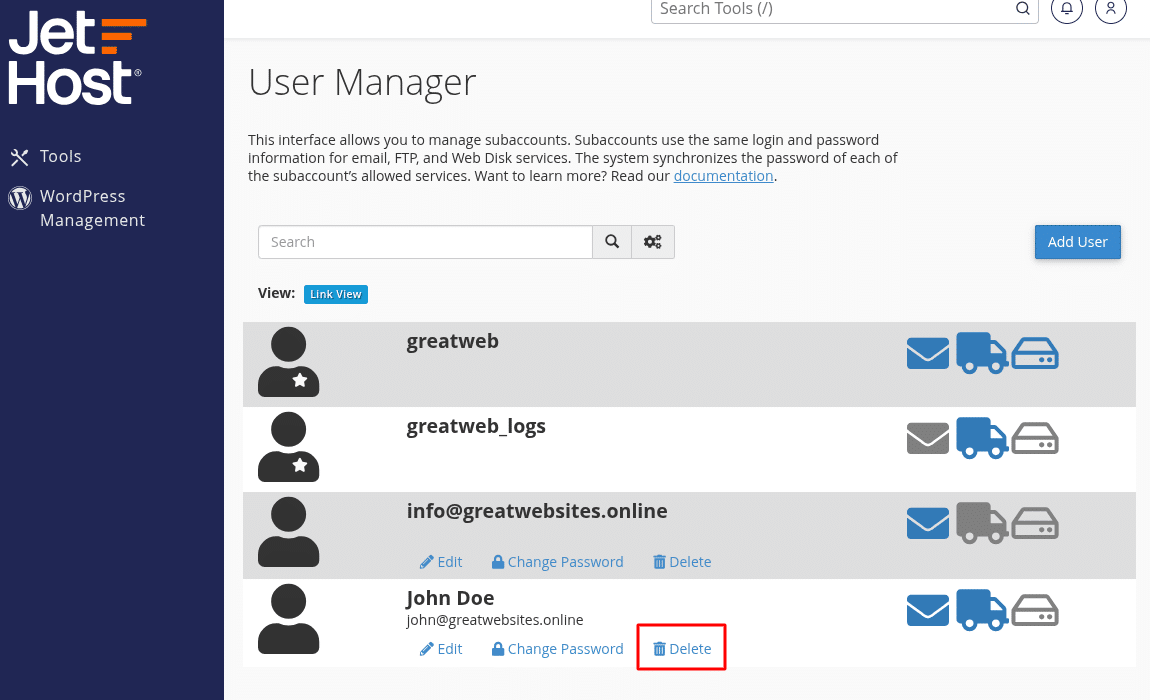
Any updates will apply right away, and the changes will reflect in your hosting account instantly.
JetHost Experts Tip
If you’re giving FTP access, make sure to assign the correct home directory. This prevents the user from seeing or modifying files outside their folder. You can use User Manager in cPanel on JetHost to fine-tune access based on tasks – like uploads, email only, or full control.
Need More Help?
Not sure which type of access to grant or need help setting things up? Contact us and we’ll walk you through it. You can also check out our other tutorials about file permissions, secure access, and hosting management on JetHost.


