



Folders in Roundcube
Folders keep your mailbox organized – a place for projects, clients, receipts, or anything else. This guide shows how to create and manage folders in Roundcube, and how to subscribe to folders you already have so they show up in your inbox list.
Create a folder
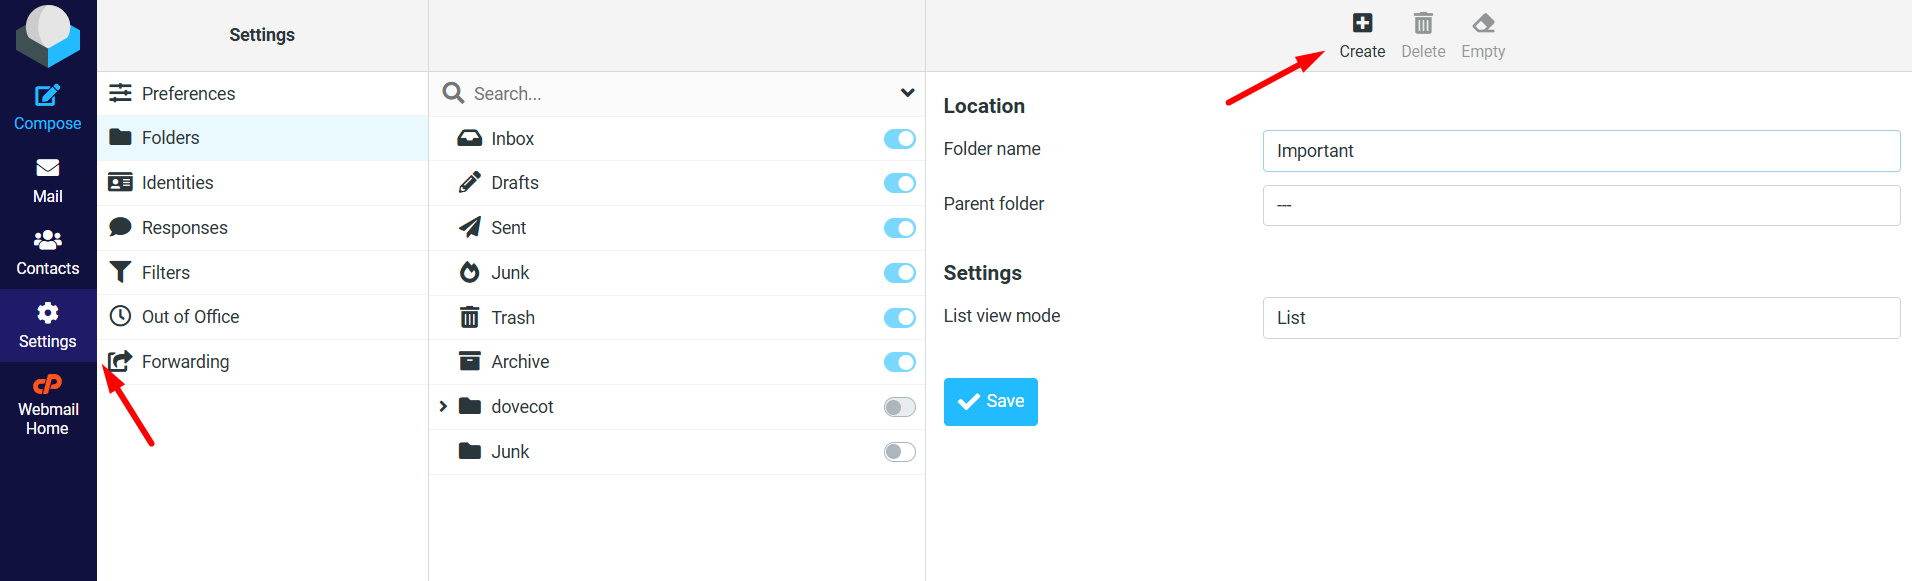
- Log in to your webmail and open Settings → Folders.
- Click the + (Create) button below the folder list.
- Type a folder name. To nest it inside another folder, choose a parent folder.
- Click Save. The new folder appears in your list.
Subscribe to existing folders
Sometimes a folder exists on the server – created in another mail app, for example – but does not show in Roundcube. That means it is not subscribed. To fix it:
- Go to Settings → Folders.
- Find the folder in the list – unsubscribed folders appear greyed out.
- Tick the checkbox next to it to subscribe. It now shows in your mailbox.
To hide a folder without deleting it, simply untick the box to unsubscribe. Note that core folders such as Inbox, Sent, and Trash are always there and cannot be removed. Once your folders are set up, you can move messages into them by dragging, or by using the Move to option in the message toolbar.
Rename or delete a folder
In Settings → Folders, click a folder to select it, then use the actions menu (the gear or the icons below the list) to rename or delete it. Deleting a folder also removes the messages inside it, so move anything you want to keep first.
JetHost Experts Tip
If a folder you created on your phone or in Outlook is missing from webmail, it is almost always just unsubscribed – not lost. Subscribe to it under Settings → Folders and it reappears with all its messages.
Need more help?
Stuck on a missing or stubborn folder? Open a ticket through Client Area → Support Tickets and our team will take a look.