



How to create Email filters
Email filters automatically sort your incoming mail – moving newsletters to a folder, flagging important senders, or deleting obvious junk before you ever see it. This guide shows how to create and manage filters from your JetHost webmail.
Create a filter
- Log in to your webmail and open Email Filters.
- Click Create a New Filter and give it a clear name.
- Set the condition – for example, From contains a certain address, or Subject contains a word.
- Choose the action – deliver to a folder, redirect, discard, or mark as read.
- Click Save.
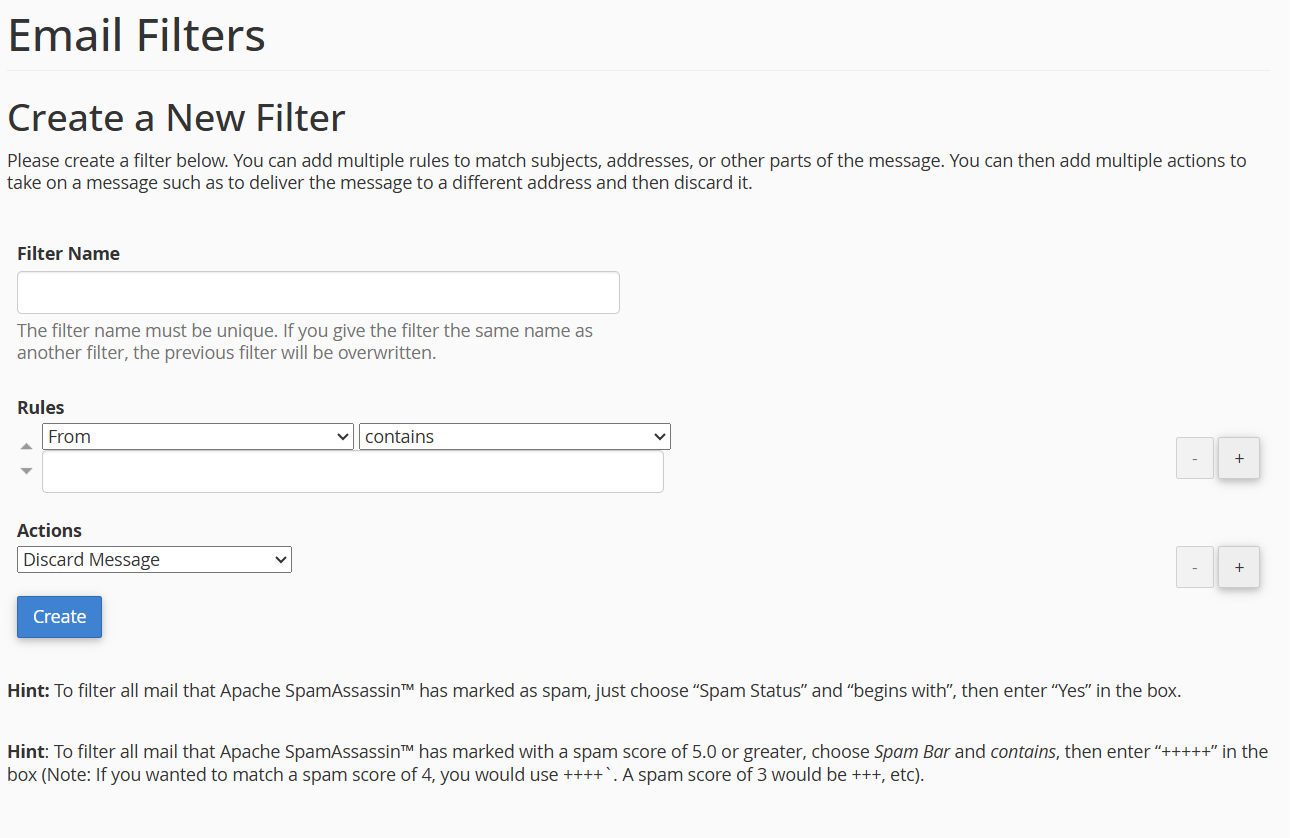
The filter runs on every new message from now on. You can add as many as you like, and they apply in order from top to bottom – so put the most specific rules near the top. Filters only act on incoming mail going forward; they do not reorganise messages already sitting in your inbox.
Useful filter examples
- Send all mail from a supplier straight to a “Suppliers” folder.
- Move newsletters (Subject contains “newsletter”) out of your inbox.
- Automatically discard messages from a repeat spammer.
Test and edit filters
You can edit or delete any filter from the same page, and reorder them so the most important rules run first. If a filter is not catching what you expect, check that the condition matches exactly – a small typo in an address or word is the usual cause.
JetHost Experts Tip
Be careful with the “discard” action – discarded mail is gone for good. When you are not sure, move suspect messages to a folder instead, so you can review them before deleting.
Need more help?
Filter not working as expected? Open a ticket through Client Area → Support Tickets and our team will help you fine-tune it.